Nucleus One gives you the power to create fillable forms for your business from directly within the application. Once you’ve created your form, simply make it public and publish the hyperlink on your company’s website to have people filling out the forms with ease. If you don’t wish to publish it on a site, you can simply send the hyperlink to those you wish to fill out the form.
In order to create forms in Nucleus One, you must be either an Organization Admin, or a Project Manager.
- Choose a Project.
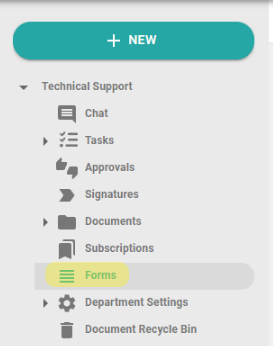
- Click Forms.
- Click the Plus button to create a new form template. To edit an existing form template, click its name and skip to step 6.
- Enter a name for the new template and click CREATE.
- Watch the short animation explaining how to add fields to the form, then click CLOSE.
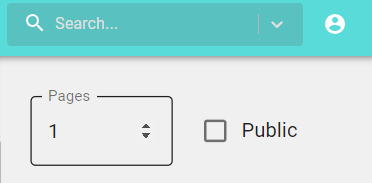
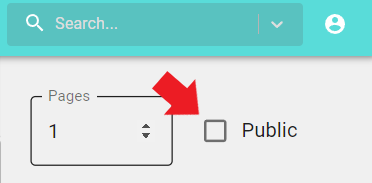
If your form needs to be multiple pages, you can increase the page count using the page box on the right under the search bar. You can type in the field or use the arrows to change the value.
You can change which page of the form you are working on by using the arrows in the toolbar across the top or clicking the go to page button to jump to a specific page.
- Drag a field from the selections on the left onto the body of the form.
Presentation
Labels are non fillable fields for conveying information on your form.
You can change the font size of the text in the field by replacing the default 16 on the right panel with your own value, or clicking the up and down arrows that appear in the Font size box when you click into it.
The double vertical ellipses allow you to move the field around the form. Clicking the arrows on the right panel allows more fine adjustments to the field’s location.
You can also resize the width of the field by clicking on the rightmost edge of the field and dragging to your preferred width.
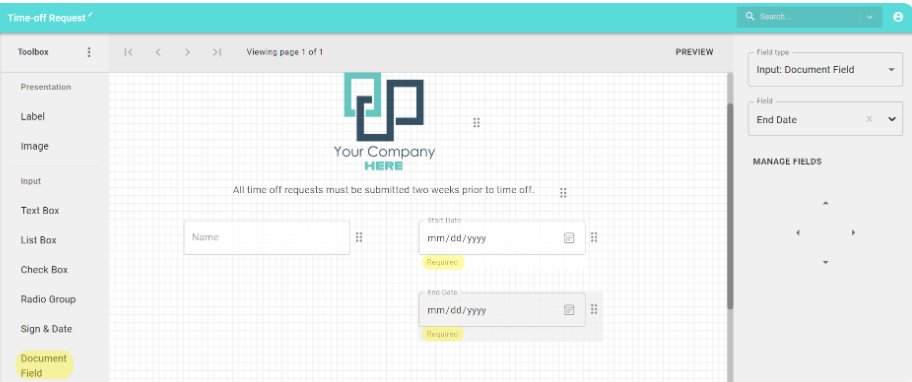
In this example, we have the name of the form at the top and some instructions about when the form must be completed prior to the time off.
Image fields allow you to upload images to your form by clicking SELECT IMAGE on the right panel. Then browsing to the image you wish to use on your local device.
Input
Document Fields are linked to the fields that are part of the project. Any values entered in these fields will also be entered in Nucleus One’s document fields when the document is captured.
In the example, we’ve added the Name field for the person requesting time, as well as the Start and End dates of the time requested.
You can also see that since the two date fields are required fields in Nucleus One they have the required tag under them on the form.
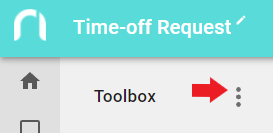
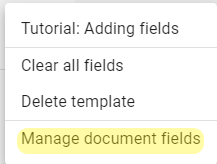
If you need additional document fields you can click Manage Fields, under the Toolbox menu.
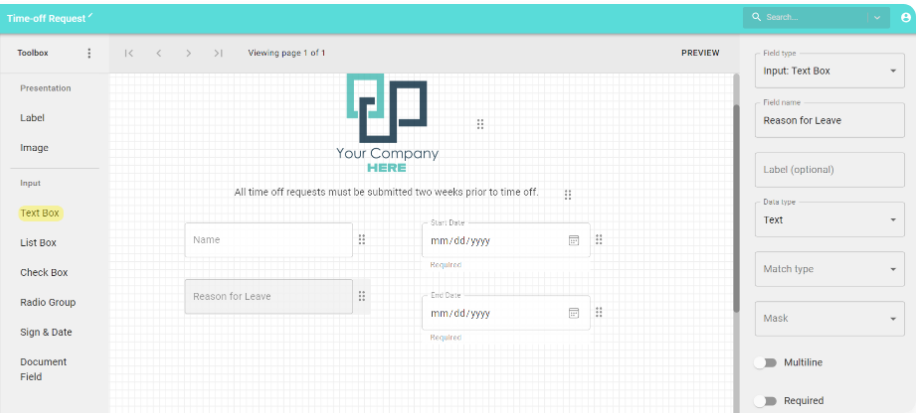
Text Box fields are fillable text fields that will save on the form but aren’t tied to Nucleus One document fields. Using the right panel, you can name the new text box.
The text boxes have all the same data types and most of the options are available to them as a Nucleus One Document Field.
In this example we’re using a single Text Box field named Reason for Leave, which is of the Text Data type.
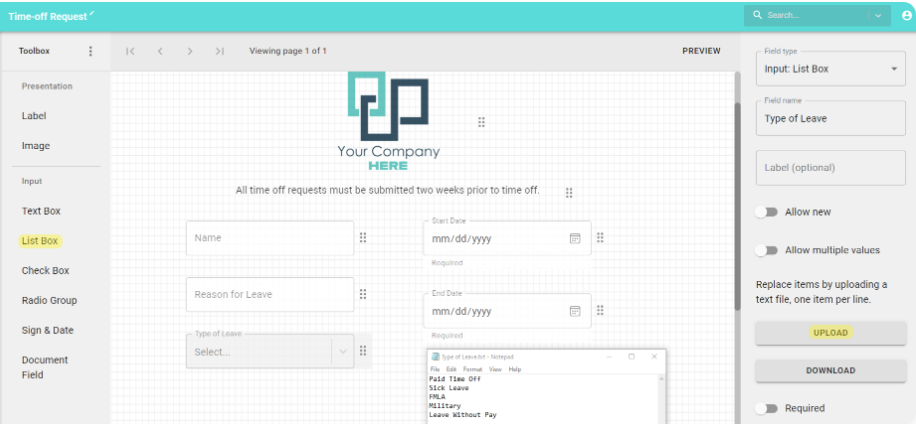
List Box fields are dropdown lists that can be populated by uploading a text file that contains one entry per line.
In the example, I’ve created a Type of Leave list and uploaded it using the UPLOAD button in the right panel.
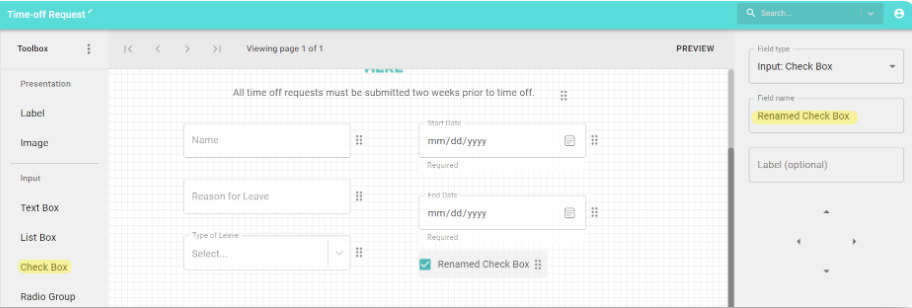
Check Box fields add simple check boxes to the form. You can rename the check box field by adding a value to the Field Name box on the right panel.
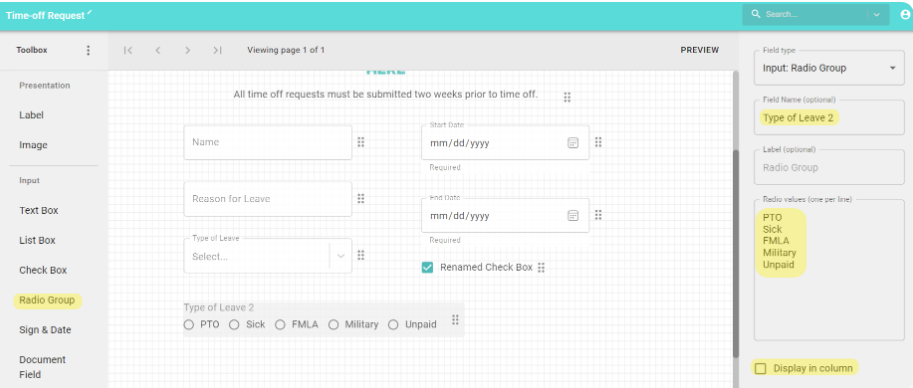
Radio Group fields allow an alternative to a dropdown list by presenting all of the options on the form. Name your field, then enter your choices in the Radio Value box on the right panel. You can toggle whether the buttons are displayed horizontally or vertically by clicking the ”Display in column checkbox”.
In the example we added the Types of Leave again using the Radio Groups.
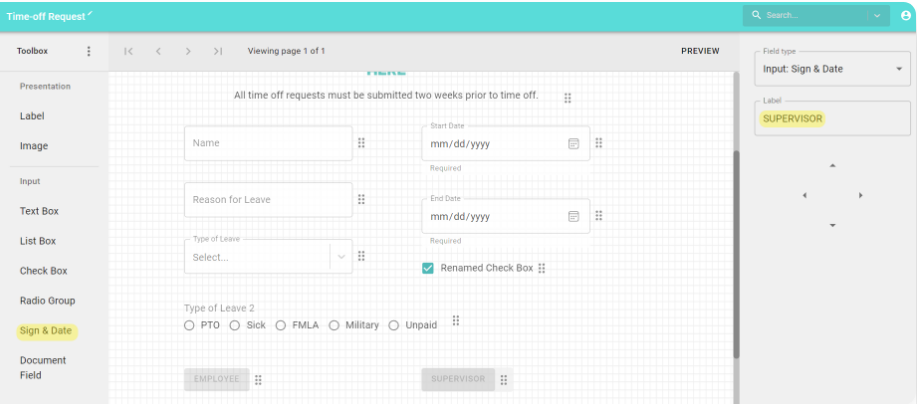
Sign & Date fields allow you to define areas that require signatures on the form. It will create a button on the form that when clicked will prompt for the signer’s name to be typed into a field. You can name the field using the Label area in the right panel.
In the example, we’re requesting the employee’s signature and their supervisor’s signature.
You can change an existing field’s type at any time by selecting another type from the Field Type dropdown in the right panel.
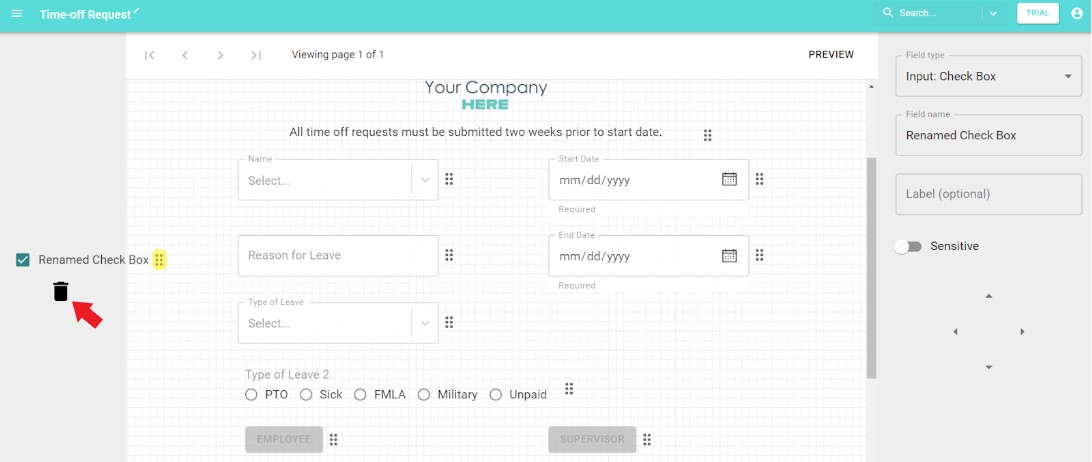
To remove any unwanted fields from the form template:
Click the double vertical ellipses and drag the field to the left panel into the trash can.
You can preview the form at any time by clicking the PREVIEW button on the top toolbar.
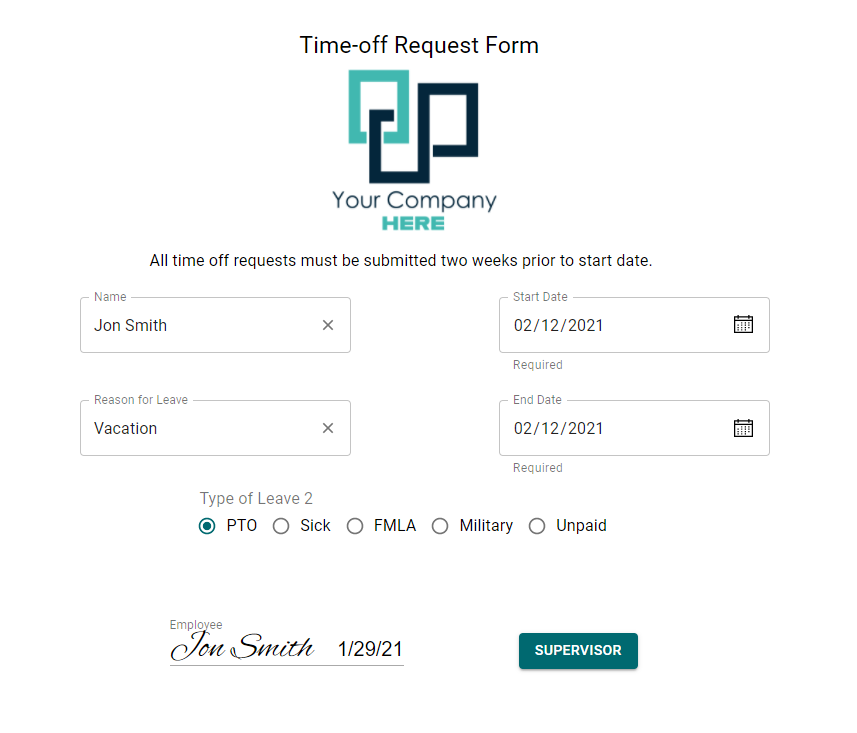
Here is a preview of the example form that we just created after Jon Smith has clicked the Employee signature button. Now, it just needs his supervisor’s signature.
The form is automatically available to members of your Nucleus One project.
You can make it available outside of Nucleus One by clicking the Public checkbox on the right panel.
You can then obtain the public URL by clicking PREVIEW and copying the address from your address bar.
