Signatures are used for a number of reasons ranging from certifying information is correct to acknowledging something has been reviewed. The signing of a document can be used internally or externally. Setting up a signature in a workflow process or through a form is easy and a widget can keep track of what is still outstanding.
Document Signatures
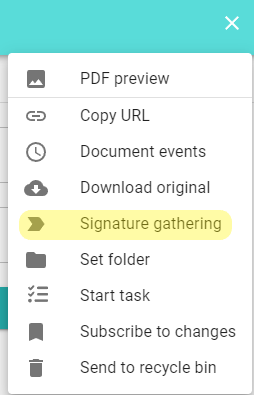
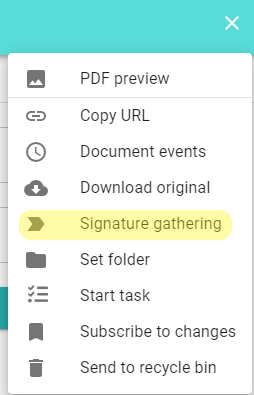
In order to create a signature for a document, locate and open the file in Nucleus One. Click on the vertical ellipsis to open the document options.
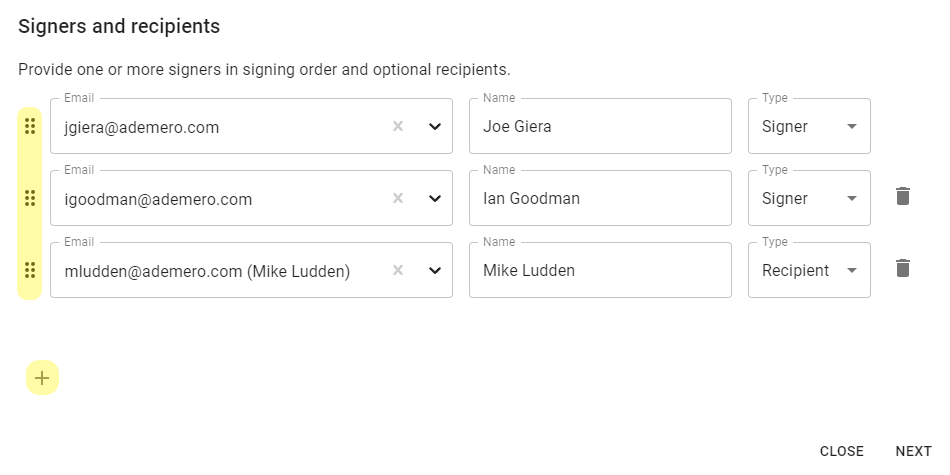
Selecting “Signature Gathering” will prompt you to add the signers and recipients of the document.
At least one signer is required. Multiple signers and recipients can be added by clicking the plus sign in the bottom left. The email address, name, and type (signer or recipient) are required for each member of the signature process.
After deciding on who will be part of the signature process, you can change their order by clicking the set of six dots to the left of their names and dragging each member to the desired place.
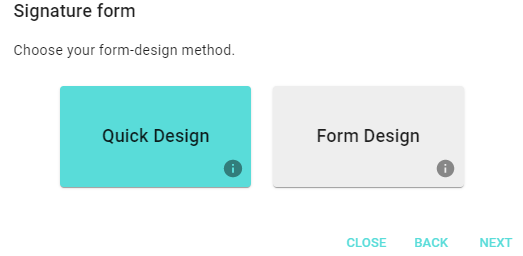
The next stage will give you two options to choose from for the type of signature form design: Quick Design or Form Design.
Quick Design
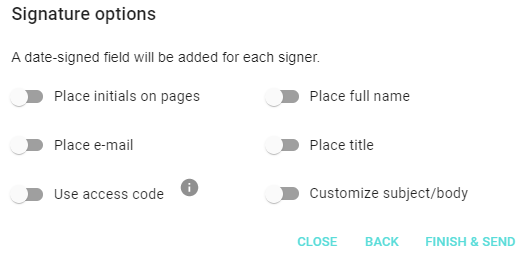
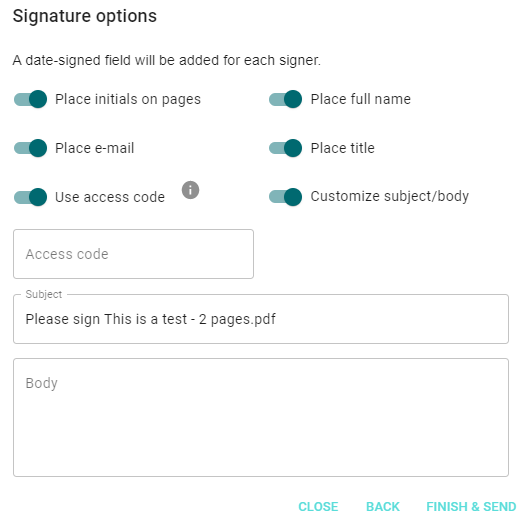
Quick Design allows you to simply add the signature options and send without having to do any additional set up. This will create another page at the end of the document and for the signatures to be added. The date will be automatically added for each signature.
The signature options include:
- Initials
- Full Name
- Title
- User Access Code
- Customize subject/body
Toggle on to enable each desired option. If the access code is selected, make sure to enter a custom code and send to the members of the signature in a separate message such as email.
Click on the Finish and Send button once all selections have been made and any custom message has been added.
Multiple signatures will be sent one at a time as a workflow process to each member in the order they were assigned as they are completed.
Form Design
Using Form Design allows you to customize the signature locations. This is for documents like contracts or agreements that may have designated locations for signatures within the document and the signature cannot just exist on an additional last page.
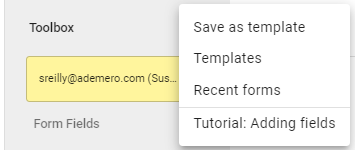
The signature designer page will provide a tutorial on how to add each signature field option. The signature options can be accessed by clicking the vertical ellipses to the right of Toolbox. They allow you to save as a new template, select from an existing template, or select recently used forms.
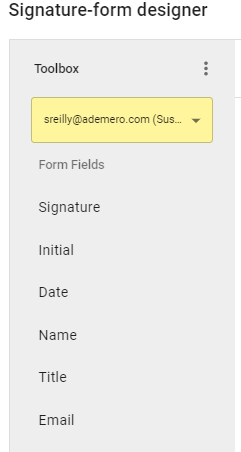
Select the form field option and drag it onto the document to set up the signature form template. Then, drag it to the designated location for that signature.
The signature options give the ability to assign each form field for each member. Select the signer to begin.
Form Field Options:
- Signature
- Initial
- Date
- Name
- Title
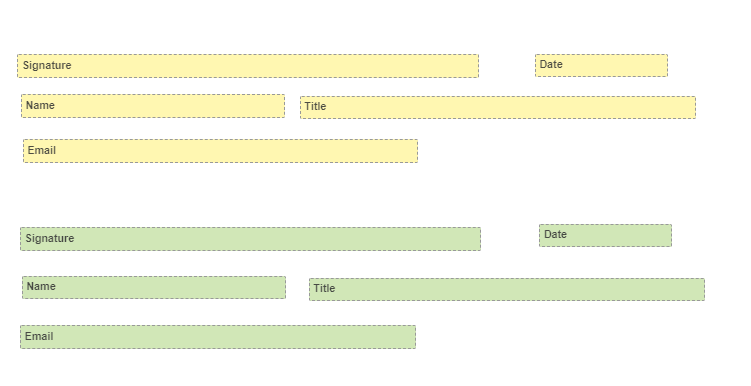
Each option can be used multiple times for each member.
Each signer will be assigned a color to easily identify the form field for each member.
To add form fields on different pages of a multipage document, use the page navigation arrows or use the Go to page option to navigate to each page of the document.
To complete the signature form designer template, hit next to either use an access code, customize the message, or just finish and send. This will be sent to all members for signature.
Completing Signatures
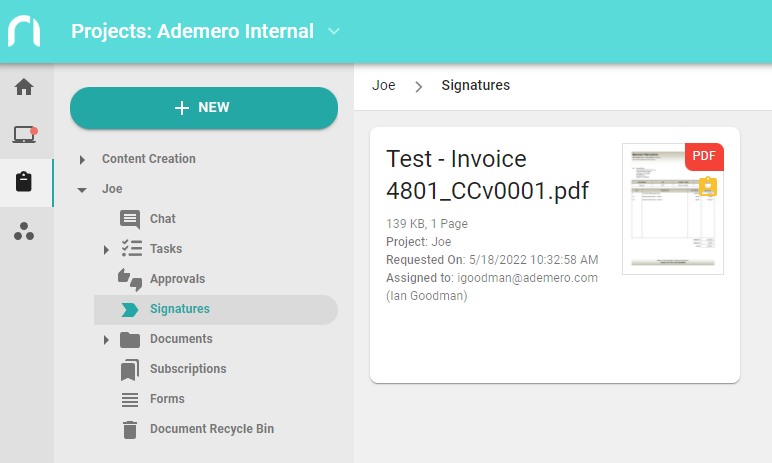
Now that the signatures have been sent, making sure signatures are completed can be viewed in a number of ways. The Signatures section of a project or department will allow you to view any documents currently awaiting signatures.
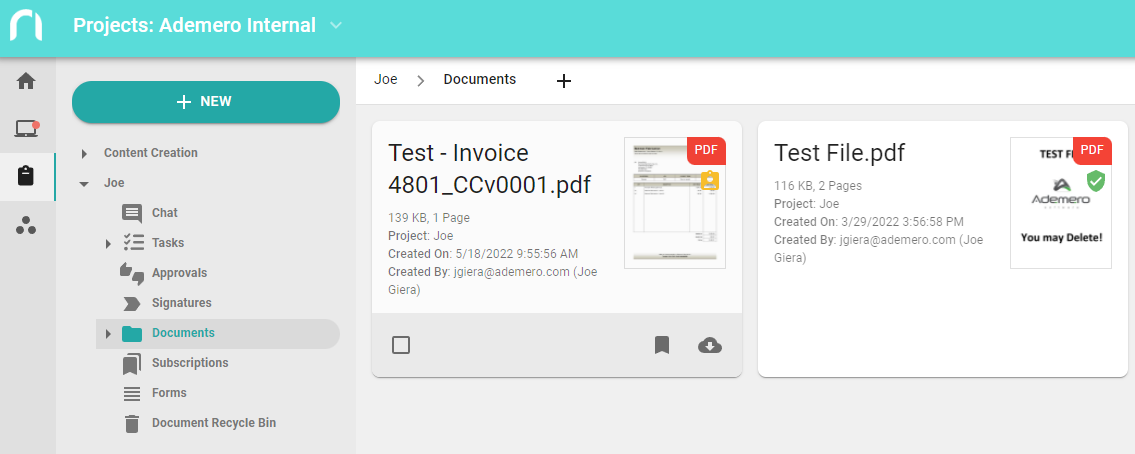
You can also search or browse to the document in the Documents section. The thumbnail of any document pending signatures will have a yellow icon, while any document that has been signed by all signees will have a green icon.
When you open a document that is still waiting for signatures a Signature Request bar will appear across the top to indicate there are signatures pending.
Document Signature Option
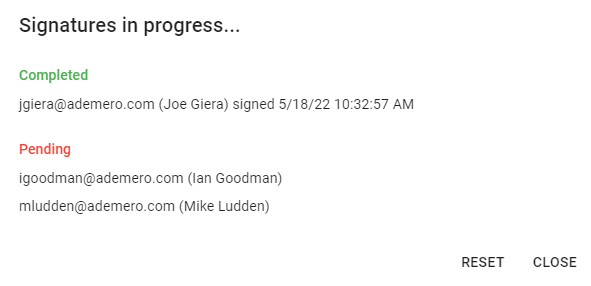
The signature status can be checked in the document options by once again selecting “Signature Gathering.” The resulting window gives complete details on the signature progress including who has completed the signature and who is still outstanding.
These options allow for any follow up actions that may need to be taken.
Completed Signatures
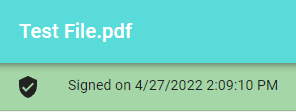
The document will display a completed signature banner once the signatures have been completed.
This will indicate to other users that the document has been signed. In addition to the banner, the document options will no longer display the signature option to prevent additional attempts to sign the document.
